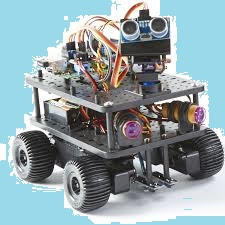
Robotics with raspberry PI is one of Robotics types that can be an excited option introduced to others about Robotics programming. However, it may be more challenging for beginners to understand. Besides, it is also an expensive project to learn.
In the learning process of the beginners, they should know about how to create easy to construct and economical robot. In this article, you will find the tips to construct a robot and make a library of Python 3 that is easy to control by anyone.
To complete this Robotics with raspberry PI creation, you need some things such as Raspberry PI in any model, Wi-Fi dongle and connect the Raspberry PI to the router in your place, Raspbian, robot chassis kit, USB battery pack, 4 AA batteries, a L298N motor controller, and a few Blu-tacks.
Everyone will love constructing the robot chassis and you will get every required thing to start the Robotics construction. Solder the black and red wires to motor terminals. To do this step, you must know about how to solder in the right way.
When you buy a robot chassis kit, you will get a couple of DC motors included inside the pack. The two motors have been assembled but two wires of it need to be soldered to terminals to get power. Soldering is the most common work had in Robotics construction. That is why you should have this skill if you love building robots. Soldering is an easy skill to learn. However, you should get adult supervision if you are a young Robotics builder.
To start soldering your Robotics with raspberry PI, you need a soldering iron set. Make sure you do the soldering work in a clear, well-ventilated and spacious room. If you have learned the right way to solder safely, it will be a fun work to do in Robotics construction.
Building the Motor of Robotics with Raspberry PI
After the chassis is constructed, then continue to L298N H bridge controller building. The H Bridge will allow the motor to move forward and backward. Connect the motors and the terminals with wires and secure it well. Next, connect one the Raspberry PI’s GND to the L298N GND terminal. Connect the pins marked IN1 – IN4 from the L298N to the GPIO pins of Raspberry PI.
Input pins triggering and motor direction controlling can be done by turning on or off the GPIO pin. Connect the inputs to GPIO pins, such as; IN1 – 17, IN2 – 22, IN3 – 18, and the IN4 – 23. You can use the pin mapping of Broadcom to complete the construction of Robotics with Raspberry PI; the standard set from Raspberry PI Foundation.
In the learning process of the beginners, they should know about how to create easy to construct and economical robot. In this article, you will find the tips to construct a robot and make a library of Python 3 that is easy to control by anyone.
Things You Need to Construct Robotics with Raspberry PI
To complete this Robotics with raspberry PI creation, you need some things such as Raspberry PI in any model, Wi-Fi dongle and connect the Raspberry PI to the router in your place, Raspbian, robot chassis kit, USB battery pack, 4 AA batteries, a L298N motor controller, and a few Blu-tacks.
Everyone will love constructing the robot chassis and you will get every required thing to start the Robotics construction. Solder the black and red wires to motor terminals. To do this step, you must know about how to solder in the right way.
Soldering the Components of Robotics with Raspberry PI
When you buy a robot chassis kit, you will get a couple of DC motors included inside the pack. The two motors have been assembled but two wires of it need to be soldered to terminals to get power. Soldering is the most common work had in Robotics construction. That is why you should have this skill if you love building robots. Soldering is an easy skill to learn. However, you should get adult supervision if you are a young Robotics builder.
To start soldering your Robotics with raspberry PI, you need a soldering iron set. Make sure you do the soldering work in a clear, well-ventilated and spacious room. If you have learned the right way to solder safely, it will be a fun work to do in Robotics construction.
Building the Motor of Robotics with Raspberry PI
After the chassis is constructed, then continue to L298N H bridge controller building. The H Bridge will allow the motor to move forward and backward. Connect the motors and the terminals with wires and secure it well. Next, connect one the Raspberry PI’s GND to the L298N GND terminal. Connect the pins marked IN1 – IN4 from the L298N to the GPIO pins of Raspberry PI.
Input pins triggering and motor direction controlling can be done by turning on or off the GPIO pin. Connect the inputs to GPIO pins, such as; IN1 – 17, IN2 – 22, IN3 – 18, and the IN4 – 23. You can use the pin mapping of Broadcom to complete the construction of Robotics with Raspberry PI; the standard set from Raspberry PI Foundation.

